Install ScanSuite Teams
Run the installer, create the first team, and bring the platform up.
1. Run the installer
Copy your ScanSuite Teams licence file to the current directory and run the installer:
bash -c "$(curl -sSL https://scansuite.eu/install-teams)"The installer reads the six-character code from the licence file name, installs into /opt/scansuite (creating it with sudo on the first run), copies the licence into its key/ folder, checks the host, downloads the images for your licence and starts everything. Running it again on the same host is safe: it repairs an installation rather than duplicating it. Teams has its own licence file — a licence for another edition will not install it, even when the file name looks the same.
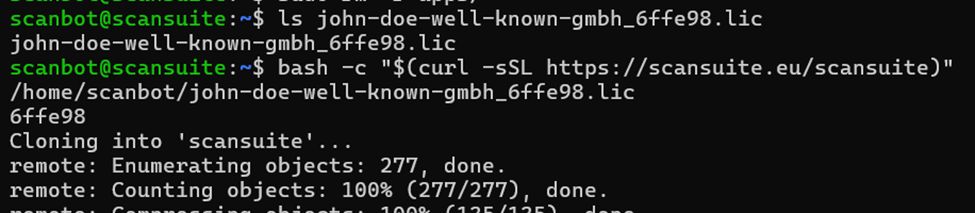
The host checks warn rather than stop: less free disk space than the images need, or another program on ports 80 and 443, is reported and the installation goes on. Only a missing Docker that the installer cannot install stops it.
2. Provide the registry password
If the host is not signed in to the image registry yet, the installer asks for the password. Paste it when prompted (it starts with dckr_pat_):
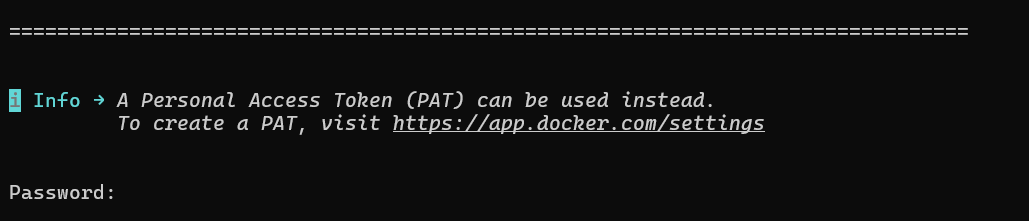
A host where sudo docker login was already run is not asked: when a download is refused for your own account, the installer tries it again with sudo before it prompts.
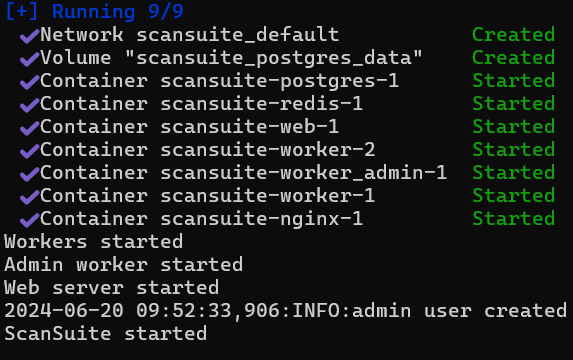
Wait until all containers are downloaded and the installation is finished. ScanSuite then starts, and the installer waits until every service reports healthy before it returns:
3. Create the first team and administrator
A fresh installation has no accounts, so the first page ScanSuite serves is a setup form at /setup. Open the console in a browser, name the first team and yourself, and set your password. Nothing is generated and no password is written to a log. That first account administers both the team and the installation; adding more teams and admins is covered in Installation administration.
4. Know your way around
Everything else is one command in /opt/scansuite:
./scansuite status              # what is running
./scansuite logs web            # recent log lines for one service
./scansuite doctor              # check the host and the installation
./scansuite update              # fetch the current release and apply it
The full list is in Setup parameters and services.
Choose what is installed
By default the installer downloads every external scanner container and DefectDojo — about 40 GB of images. A host that does not need all of them uses far less space: without scanners and DefectDojo the images take about 7 GB. The one-liner installs everything; to run only some of it, change the selection with ./scansuite update in /opt/scansuite:
cd /opt/scansuite && ./scansuite update --no-scanners --no-dojo| Option | What is installed |
|---|---|
| --no-scanners | No external scanner containers. |
| --static-only | Only the static (code) analysis scanners. |
| --dynamic-only | Only the dynamic analysis and infrastructure scanners. |
| --all-scanners | Every scanner. The default. |
| --no-dojo / --with-dojo | Leave out DefectDojo, or bring it back. |
The options combine, for example --static-only --no-dojo. The choice is saved in .env, so later updates and starts keep to it until you give another option to ./scansuite update. Scans that need a scanner container you left out are not available until you bring it back, for example with ./scansuite update --all-scanners.
Behind a web server the host already runs
ScanSuite brings its own nginx on ports 80 and 443. If the host already serves those ports — its own nginx, Apache or a load balancer in front of several sites — let that server proxy to ScanSuite instead: see SSL/TLS Setup. The installer notices a port that is taken, says which program holds it and starts everything else.
If a service does not come up, or the output looks different from the figures, ask the installation what is wrong with ./scansuite doctor and work through Troubleshooting.
Last reviewed 2026-09-29